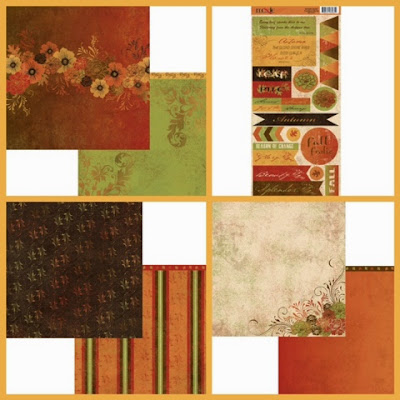
Pages

My Close To My Heart webpage

My Close To My Heart webpage
I am a ctmh consultant

*

*

About Me

My photo
hi, i am jen t. welcome to my blog and ttys!

Translate

Past Dt's and Ambassadorships

*

*
Love from lizi dt

.

*

*

*
birds of a feather kit co.

*

*

*

*

Followers

Search This Blog

*

*

*

Creative Scrappers

Wednesday, September 24, 2014

Autumn is a second spring card and tag using Moxxie autumn glory collection

 Hi all, happy fall!  I am ready for falling leaves and  crisp air..are you? I am here today to share a fall card and tag that i made using the autumn glory collection. This collection is gorgeous! I just loved working with the beautiful rich colors and design! This week i bought some new punches and i started with a strip of the burnt orange paper but i made a mistake with the punch... I love the challenge of fixing mistakes (as silly as that sounds) because i challenge myself to make it into something pretty. So, i took some stickers off the sticker sheet and layered them with a punched circle and added over my mistake with a gem brad and layered some barcode patterened strips, twine, and the fab autumn saying sticker. Lastly, i distressed all the edges to give some texture to the card. For the tag i added  layered up some stickers and tucked punched swirls underneath with a gem brad in the center and topped it off with some cool twine.  My no measuring tag tip: cut a strip the whole length of the paper (this paper was 12 x12) and any width you like. Fold it in half add glue to inside. The just cut the top two corners on an angle. Then embellish. Thanks for stopping by and happy creating!!   Jen T.  :)  


Moxxieness i used: 
AG-1454  Fanciful Flowers 
AG-1455  Season's Beauty
AG-1457  Bountiful Bouquet 
 

http://www.gotmoxxie.com/site/index.php?cPath=247_249


From my stash: 
twine 
gem brads
Border punch 
Swirl punch 

Tuesday, September 23, 2014

your a star!! card for speedy scrappers


Hi all, happy tuesday!!i am just over the moon excited to make another card for you! ;) For this card i used the kaisercraft blast off papers. I started with my favorite size card base 6 x 6 of the kaisecraft blast off star paper then I layered on strips of barcode style paper and zigzag border stickers from the hello sunshine collection and distressed some of the edges a bit. then, I cut out the your a star square from the blastoff cut apart sheet and a star from another sheet to popdot it and layer. next.I cut out of another sheet of paper the cute lil alien and only half pop dotted him and placed him below the star to look like he was holding it up. lastly,  I used dimensional glue to accent the lil stars and the alien eyes. thanks for stopping by and happy creating!   jen t.


To check out more awesome goodies and inspiration "like " Speedy Scrappers at www.facebook.com/speedyscrappers and visit the website at www.speedyscrappers.com  or get your supplies in the Speedy Scrappers store.


Monday, September 22, 2014

Sneek peek of a card i made for ss

Here is a peek ๐Ÿ‘€of a card i made for @speedyscrappers.make sure ya check back tuesday to see the whole project ๐ŸŒŸ#kaisercraft #speedyscrappers #stars


Look what i got for free!


I just got two of these for free:) think marker/tool storage/planner holder 

๐Ÿ˜ i just paid two dollars shipping. Use my invite link for Wish and get $10 off your first purchase!

 Sign up now at: http://wish.com/s/7fvbZC (copy and paste this link)

Tuesday, September 16, 2014

Too cute!! Kids bedroom door sign for ss

Hi all, happy tuesday!!! Hope you are having a great day! Ok, so this glossy diecut just screamed for me to make it into something more than a scrapbook page. So i needed a new sign for my lil ones door and that is what i made using the kaisercraft hello sunshine collection. I first grabbed a piece of old cardboard (or a piece of the backing from a paper pad works well too) and cut it into a circle about an inch smaller than the diecut and adhered it to the back of the diecut. Then i took the letter stickers from the collection and added my lil ones names. I then bent a banner sticker border and added it to the top left corner. Next, i added some of my diy enamel dots to every other scallop and a little flower to the lion to make one a girl since the sign is for a boy and girl. Lastly, i hole punched two spots near the top and tied an polka dot ribbon to the top so i can hang it. Happy creating!   Jen t.     :)


Close up of the paper.
( I tried to get a pic of the fabulously glossy animals on the paper but the camara pic just doesnt do it justice.) It is like glossy affects on them. So cool! 


To check out more awesome goodies and inspiration "like " Speedy Scrappers at www.facebook.com/speedyscrappers and visit the website at www.speedyscrappers.com  or get your supplies in the Speedy Scrappers store.


Monday, September 15, 2014

Follow me on bloglovin

<a href="http://www.bloglovin.com/blog/5383015/?claim=nphtxkehzyu">Follow my blog with Bloglovin</a>

Friday, September 12, 2014

Moxxie Fall Challenge Blog Hop


The Muses have some wonderful inspiration for you this month. Here's a little peek at what you'll find along our hop:


I know you're intrigued and excited to get hopping, but before you go I want to tell you about something NEW we're doing on the Moxxie blog.

We challenge YOU to join us! That's right!
We want you to jump in on our challenge and create something with a fall theme, then go back to the Moxxie Blog and link it to our post for an entry into our giveaway!
You will find all of the details below.

Here is your inspiration list:
You might be wondering what your prize will be?
If you are picked for our winner you will get this gorgeous Autumn Glory line to create some gorgeous fall projects of your own!


All you have to do to be entered to WIN is leave a comment on the Moxxie blog.
(US addresses only please)
BUT, you can get your name in the hat more than once!
Join our challenge and link back to the Moxxie blog for another chance to win!
Use MOXXIE product in your project and get 3, yes I said THREE, more chances to win!
You will have until the end of the month to enter your project and we will announce our winner on the 1st of Oct.

Ways to win:
- Comment on the Moxxie blog.
- Join our challenge! (Link your project with our Inlinkz tool)
- Use MOXXIE on your project and get 3 more entries in the draw!
- Visit each designers blog and leave a comment. The more you comment, the more chances you have to WIN!
- Go to the Moxxie facebook page and share our post about this hop for another chance to WIN! (if you're not already, you will need to be a follower of our page to do this) Come back to the Moxxie blog and leave another comment letting us know you did this.
- Go ahead and Pin It! If you do, leave a comment on the Moxxie blog with a link letting us know that you Pinned!
 
 here is what I made using the autumn glory and grid iron papers. I just love the rich fall colors of these collections!! I had a ton of fun making this!
 
 
 hanging autumn door cone
hanging door autumn cone 
close-ups  -

close-up of handmade paper beads and flowers

Moxxie items used to make this :
autumn glory papers
grid iron papers

from my stash:
scalloped circle punch
brown distress ink
wire
tacky glue
sparkle brads
piece of syrofoam
lace border punch
ribbon
glitter glue
Brown distress ink


JEN T.


Tuesday, September 9, 2014

I am thankful for... Pocket page for ss


Hi all, happy tuesday!! I am popping on to share a fun pocket page-page i made using the hello sunshine diecuts, stickers, and cut aparts. This collection is super cute!  i had random pics i wanted to use from different dates so i thought pocket page. I used the number and month stickers on the corner of the pics to remember when the pics were taken and used the 4 x6 cut aparts to go in the pockets where my pictures weren't. I then used the fun striped paper to mat my pictures that I cut to 4x 6 and cut my pics slightly smaller. Next, I added sticker and diecut words and shapes to accent the pictures. I lastly, added faux stitching onto the cut aparts, inked the edges a lil and rounded the edges of all the cards with my corner punch. Tip- Don't have pocket pages?!  Just use the same page design and mat the cards onto a solid color 12 x12 piece of cardstock for a similar look. Make sure you grab your hello sunshine collection at speedy scrappers today. Thanks for stopping by and happy crafting!  
 Jen t. 


Pocket page layout using 4x6 pockets 


(Isn't this whale so stinkin cute!!!)


To check out more awesome goodies and inspiration "like " Speedy Scrappers at www.facebook.com/speedyscrappers and visit the website at www.speedyscrappers.com  or get your supplies in the Speedy Scrappers store.


Friday, September 5, 2014

Poppin' up Zombies card using Moxxie's zombie attack


hi all, jen t. here, run! zombies are coming!!... they just walked onto some amazing papers and stickers. so of course when I saw this collection I was dying ;) to create with the zombie attack .  
 
                                                http://www.gotmoxxie.com/site/index.php?cPath=247_248
So, I thought how cool would it be for a zombie to pop up out of the card. here is a 5 x 7 card I made using  lil bits of every paper and some stickers from the collection.  Then, I distressed and inked the edges of most of the edges of  pieces to give more interest and texture. lastly for fun I made a rolled flower and added an eyeball sticker to make a creepy eye and fussy cut and pop dotted a zombie silhouette. beware! creating with this collection is addicting so make sure you get your hands on it asap. thanks for stopping by and happy creating!!
                                                                               --jen t.--


5 x 7 card front


pop up inside of card


up close pic of card
Moxxie supplies:
ZA-1450  Dead Man Walking
ZA-1451  Hallowed Ground
ZA-1452  Apocalypse
ZA-1453  Zombie Cutouts
ZA-2270  Zombie Cardstock Sticker

from my stash:
popdots
charcoal ink
white card blank


Wednesday, September 3, 2014

stinkin cute! animal birthday card for ss

Hi all, happy Wednesday! I am stopping by today to share a big and tall card (4 1/2 x 9 inches) i made using Kaisercraft's Hello Sunshine Collection. The stacking animal stickers were so stinkin cute i  just had to use them on a birthday card:) i used the stickers from the collections sticker sheet .To make it not any taller i trimmed off the alligator that was on the original sticker. i then placed that sticker on a base i made from the Snort sheet of patterned paper(9 x9) then folded it in half long ways. i then, did some fun doodling around the edges and added buttons to the right corner and banner stickers near the bottom for the sentiment. lastly, on the front i punched out a hexagon with my paper punch and added a number 5 sticker to the middle with a touch of fussy cutting on the bear hand to make it look like he is holding it. For the inside of the card, i took a scrap rectangular piece that i punched on , to use as a mat and windows to hang the two lil animal die cuts from the collection from. lastly on the inside i finished it by layering stickers to make a spot to write a lil note and doodled little corners and the label sticker. i had a lot of fun making this card . can you tell?! so make sure you get your hands on this collection so you can create a fun birthday card too. have a great day and happy creating!!   jen t.   :)


card front
I                                   


inside of card

 
To check out more awesome goodies and inspiration "like " Speedy Scrappers at www.facebook.com/speedyscrappers and visit the website at www.speedyscrappers.com  or get your supplies in the Speedy Scrappers store.